Natural foods can be expensive to purchase. So, when we are not eating our own farm-raised meat, I am always looking for a good deal. I was excited to order 100% natural chicken breasts from Zaycon Foods for $1.89/lb. What a bargain!
But, when the package arrived, I realized how much space it was going to take up in my freezer. I turned to an alternative food preservation method that would last in my pantry with no refrigeration: pressure canning.
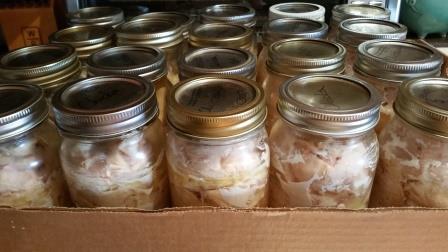
It may seem strange to can chicken, but it is extremely easy to do and is so convenient to have on my pantry shelves. The chicken is fully cooked in its own juices, and is fall-apart delicious! I use it primarily for chicken salad, Chicken Alfredo, tacos and burrito bowls.
Canning chicken is super easy! Here’s how:
- Sterilize quart or pint canning jars, rings and lids (I sterilize in the dishwasher, but you could use boiling water instead.)
- Cut chicken breasts into 1-2 inch cubes.
- Fill jars with chicken cubes, pushing them down to remove air pockets and stuff the jars full! (Contents will shrink in the canner, so don’t be shy about stuffing aggressively.)
- Add a dash of salt, garlic, or chicken bouillon, to taste. I personally don’t add anything at all.
- Close the jars and place them in the canner. Fill the canner with water, covering the top of the jars by 1 inch.
- Follow your pressure canner’s directions to process the jars at the correct pressure setting. At sea level, process at 11 pounds of pressure for dial gauge canners, or 15 pounds of pressure for weighted canners. Process for 75 minutes (pints) or 90 minutes (quarts.)
- Allow the canner to cool and release pressure naturally. Remove the jars and tap the lids to test the seals. Jars will last on the shelf for up to 1 year.
Check out The Sister’s Cafe for more photos and detailed instructions.

