Preserves with a Surprise Ingredient
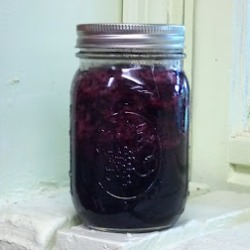
Making and canning homemade blueberry jam is so easy, and the result is delicious! Even if you are a fan of strawberry, raspberry, or some other berry jam, try this recipe. It’s fantastic, and the star anise gives it a yummy kick that will make your jam really stand out.
If you don’t like the flavor of star anise (it has a black licorice taste,) leave it out. The jam is perfectly wonderful without it.
Ingredients
- 24 ounces of raw or frozen blueberries
- 1 package powdered pectin (1 3/4 oz of dry pectin)
- 1 star anise (whole or ground for stronger flavor)
- 1/4 tsp ground nutmeg
- 1/4 tsp kosher or canning salt
- 1/2 tsp vanilla extract
- Juice of one lemon
- 5 TBSP apple cider vinegar
- 3 C raw or pure cane sugar
- 1/2 C water
Instructions
- Place blueberries in saucepan over medium heat. Add the pectin and stir it in well to distribute it evenly throughout the berries. Add the vanilla, salt, anise, nutmeg, lemon juice and vinegar and mash into the berries using a potato masher. Increase the heat to high and bring the mixture to a full boil. Decrease the heat slightly and boil for five minutes, occasionally mashing and stirring the mixture. Stir in sugar and water, and return to a full boil for 1 minute.
- If you want less anise flavor, remove the star anise. Cool the jam slightly and fill jars. Refrigerate and enjoy within a couple of weeks. If you will keep the jam longer, store it in plastic covered containers in the freezer. Or, preserve it in jars using a boiling water canner (see instructions below.)
Preserving the Jam
Wash canner pot, rack, jar lifter, wide mouth funnel, ladle, 6 jars and lids in hot soapy water. Then place all the utensil into the pot and cover with water. Bring to a full rolling boil to sterilize. Turn off the heat and leave the utensils in the pot until you’re ready to fill the jars.
After the jam is prepared, remove the tools, lids and rings to a clean towel or cutting board. Lift and drain the jars, placing them on the towel.
Place the funnel in the first jar (pick it up by the ring, avoiding the sterile interior.) Use the ladle to fill each jar just to the bottom of jar threads, leaving about a 1/4 inch headspace. You many only have enough to fill 5 jars, but you have an extra one ready in case you have more jam than expected. If a jar is short, that is okay. It will be the first one that is opened and used.
Wipe the jar rims with a moist paper towel to remove any drips or food particles. Place lids and rings on the jars. Screw the rings on just to slight resistance. Do not tighten them down. The screw rings only hold the lids in place, but should allow air to escape during processing so that a vacuum seal is achieved as the jars cool.
Return the jars to the pot in a jar rack, being certain that they aren’t touching the bottom of the pot or each other. If water is not covering the jars by at least an inch above the lids, add more water. Bring to a full boil over high heat. Once a hard boil has been achieved, start your timer. For low elevations, process the jars in boiling water for 5 minutes (15 minutes for elevations over 3,000 ft.)
After processing, turn off the heat and leave the jars in the hot water for 5 minutes. Then, remove the lid and transfer the jars to a rack, cutting board or towel to cool. Do not shake or disturb the jars for 24-48 hours while the jam sets.
You should begin to hear the lids make a loud popping sound as a vacuum is achieved. If the jars cool and the lids do not become concave and taught, process them again or put the jars in the fridge or freezer. After cooling, the rings can be removed and the sealed jars can be stored with only the sealing lid.


