Pumpkin Pie, Pumpkin Cheesecake, Pumpkin Muffins, Pumpkin Cookies, Pumpkin Cake…Yum!
What do I love about Halloween? The day after, when we gut the pumpkins and the real festivities begin. This is when the holiday baking starts, and it is my favorite gastronomic time of year! In the past, I used to wait for autumn sales on canned pumpkin, until I discovered that (gasp!) it was mostly made of butternut and squashes OTHER than pumpkin.
But that was not the showstopper. It was actually when I discovered the dangers of BPA contamination in canned goods and began to avoid processed food and preservatives that I stopped buying canned pumpkin. I was pleasantly surprised to find out that homemade pumpkin puree is actually ridiculously simple to make. In fact, I haven’t bought canned pumpkin in years, even in the ‘off season, because the puree can be frozen to use all year long!
Here’s how you can make your own.
Pumpkin Puree “Recipe”
1. Select a ‘pie pumpkin,’ which is a small or medium-sized squash (they taste better than giant Jack-O-Lantern types.)
2. Slice the pumpkin in half. Scrape out the seeds and stringy stuff with a spoon or a knife.
3. Brush the pumpkin 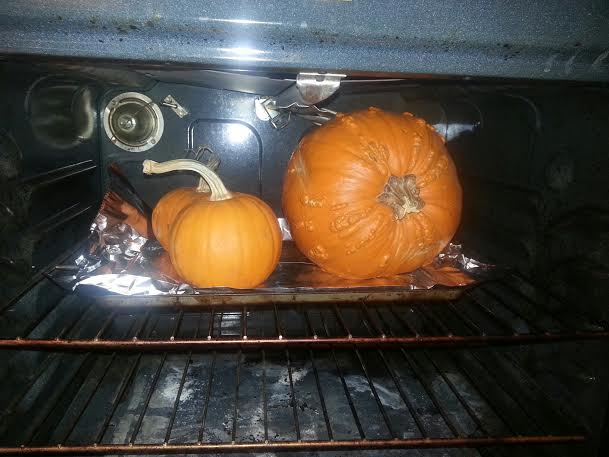 flesh with cooking oil. Any oil works, but I prefer to use olive oil or coconut oil. Sprinkle the surface with kosher salt.
4. Place the pumpkin halves cut-side-down on a cookie sheet. To save yourself some headaches later, line the sheet with foil or parchment paper.
5. Place the pumpkin in the oven and set the temperature to 375 degrees F. Roast for roughly 45 minutes, or until the skin turns bubbly and black. NOTE: Sometimes I skip all of these steps and cook the pumpkins whole until they begin to collapse. Poke each pumpkin with a fork or knife to allow steam to escape.
6. Remove the pumpkin from the oven and allow it to cool completely. Once cool, remove the skin. It should peel away easily, but you can use a knife to remove stubborn spots.
7. Chop the pumpkin into 1 inch chunks and run them through a food processor (or a really good blender,) a few pieces at a time until smooth. If the resulting puree is too thick, add water a teaspoon at a time, just enough so that you don’t burn out your food processor motor!
8. If your puree is runny, you can thicken it up by cooking it on low, stirring constantly, until the extra water is evaporated. -OR- line a colander with cheesecloth, add the puree and let it drain for an hour or two.
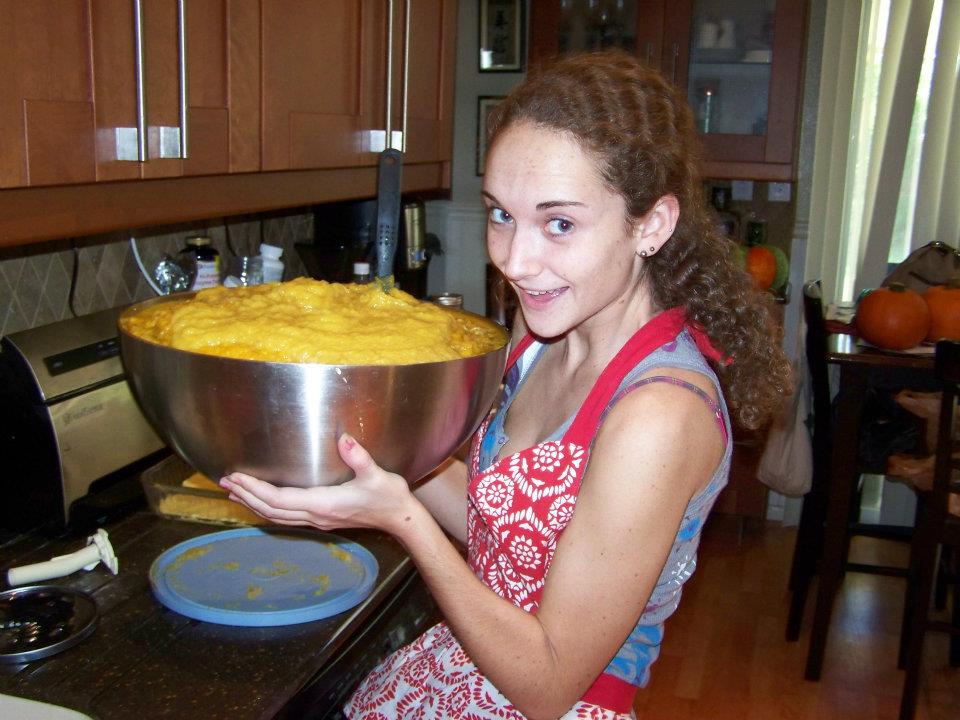
9. Use the resulting p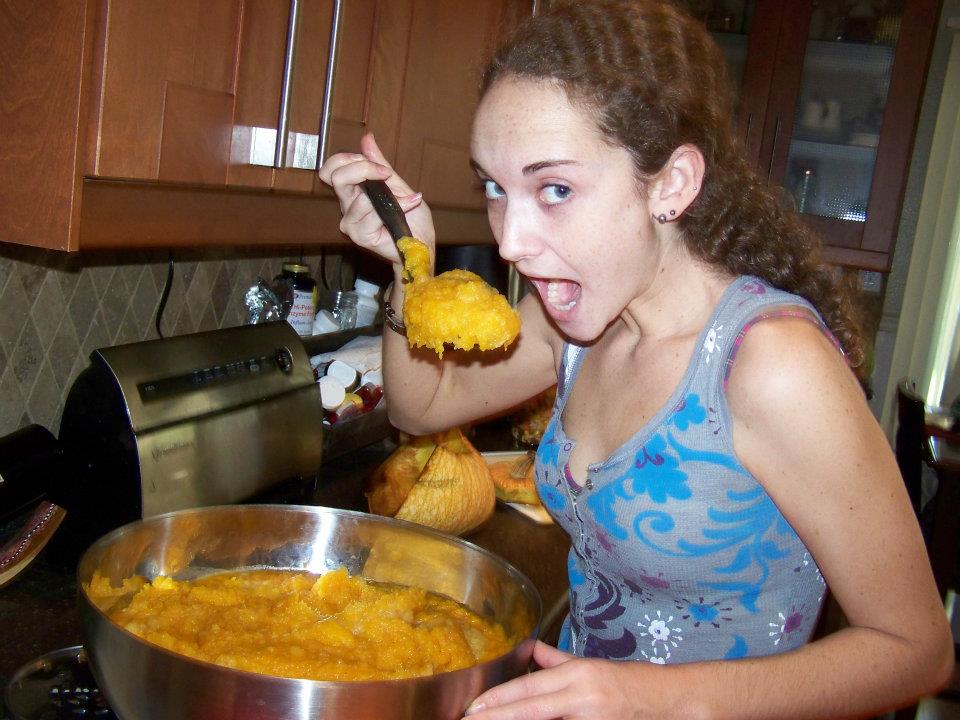 uree to replace canned pumpkin in your recipes. Here, my daughter shows off her gigantic bowl of puree.
Recommended Cheesecloth
After years of using cotton cheesecloth for straining purees, cheese and jellies, I was alerted by a friend to the virtues of the . I wish I had known about it sooner! The nylon is washable and does not get old and stinky as quickly as regular cheese cloth, and it does not need to be doubled or tripled to do the job.
Storing Pumpkin Puree
Warning: Despite how it appears in the photo, plain pumpkin puree is NOT tasty! Save it for adding to all of your pumpkin recipes, from soups to pies.
The puree can be refrigerated for up to one week. If you have more than you can use in a few days, divide it into portions for your recipes, bag, label and freeze the excess. You can store it in the freezer for several months, or longer is you vacuum seal your bags with a Food Saver machine or similar gadget.
Use a Food Saver to Preserve Pumpkin Pefectly!
Store pumpkin in the freezer for up to one year, with no deterioration of its quality, using a vacuum sealer, such as a Food Saver machine. I use this model for packaging all kinds of fruits, veggies, meats and breads for long-term freezer storage.
Grow Your Own Pumpkins
Want to take your ‘au naturale’ puree to the next level? Try your hand at growing your own pumpkins. They are very easy to cultivate, but require a little bit of advance planning because they take months to grow. Plant them mid-summer for an autumn harvest. Here’s how:

